As with user variables, collection variables enable you to save values and expressions for use at a later point in time. Collection variables also allow you to summarize and categorize data, as well as label it with additional attributes.
These collection variables can also be transferred to project includes if they are also to be used in other projects.
Example: Displaying average price for each article category as a chart.
What we have are article numbers which reflect their category:
§ Article number begins with "EX": Travel
§ Article number begins with "RNT": Rentals
§ Article number begins with "TRP": Short trips
Hence, there is no category field in the data that you can e.g. use in a chart in order to display the average price of an article for each category. With collection variables, you have the ability to combine the data of the various categories and to define properties such as a category name or a color.
For the definition of collection variables, proceed as follows:
1. Select Project > Collection Variables or click on the button "Edit Collection Variables" in the formula assistant.
2. In the dialog that appears, click on "Insert new Variable" to create a new variable. An input dialog then appears asking you to name the new variable. Give it a distinctive name, e.g. "Category". The "@" character is automatically appended to the front of the name.
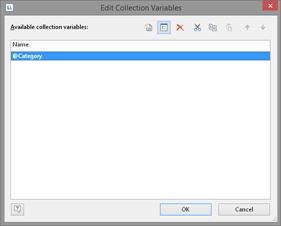
Figure 7.25: Edit Collection Variables
By clicking on the arrow buttons, you can define the order in which the analysis takes place. Variables are analyzed from top to bottom.
3. A dialog appears for the editing of the collection variable "Category". Click on the button "Insert New Variable (Column)" to add 2 sub-variables: "Name" and "Color".
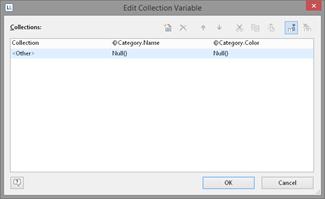
Figure 7.26: Define Variables for the Collection
4. Click on the button "Insert new collection" to insert the category definition. For our example with the article number, select the entry "Wildcard".
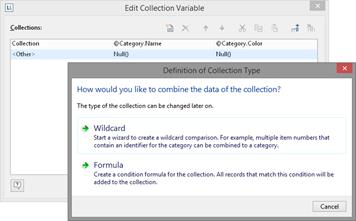
Figure 7.27: Definition of the Collection Type
5. A dialog appears for wildcard matching. Select the field "Article Number" and enter the wildcard string: EX*. Add multiple entries as single lines. Supported wildcards are "*" and "?".
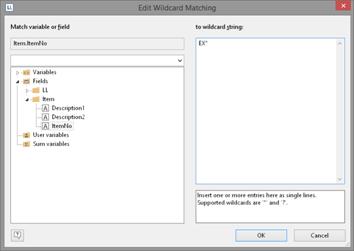
Figure 7.28: Edit Wildcard Matching
6. Repeat this step for the desired categories, adding a name and a color for each one. The dialog will then look like this:
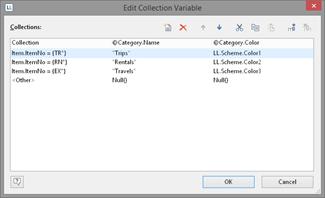
Figure 7.29: The Collection Variables
7. Once you have defined the collection variable, you can use it in your objects. In the formula assistant, you can find the variables at the end of the variable/field list in the folder "Collection variables".
8. You can now use the collection variable "@Category.Name" in the diagram as a coordinate value for the x-axis.
9. Output the average price of all articles as the y-value.
10. Use the collection variable "@Category.Color" as the color. To do so, click on the tab "Colors". Under "Fixed Colors", enter "True" as the condition and place the collection variable "@Category.Color" in the field "Formula".
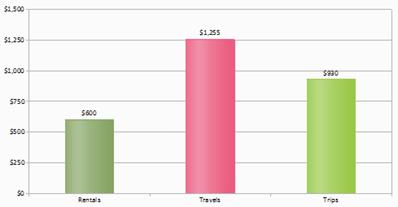
Figure 7.30: Average Price per item